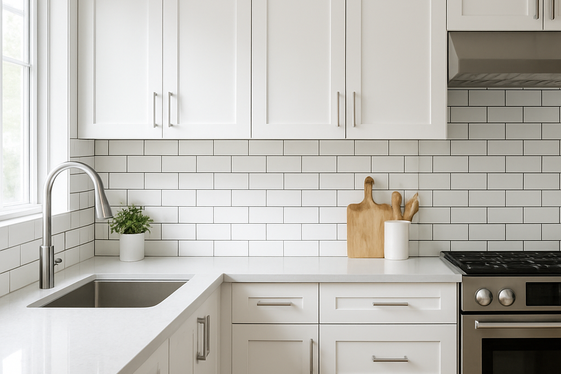

White kitchens offer a timeless and fresh canvas that brightens up any home. But while white cabinets and countertops create a clean look, the backsplash is where you can add personality and style.
Whether you want a subtle touch of texture or a bold splash of color, the backsplash pulls the whole kitchen design together. Finding the right backsplash for a white kitchen requires balancing brightness without making the space feel cold.
In this guide, you’ll discover 21 inspiring backsplash ideas tailored for white kitchens that work with various budgets, styles, and kitchen sizes. From classic subway tiles to unexpected patterns or natural stone, these ideas will help you make your kitchen uniquely yours.
Get ready to explore creative options and practical tips to update your kitchen backsplash with confidence in 2026.
1. Subway Tiles with a Twist: Colored Grout or Patterned Layouts
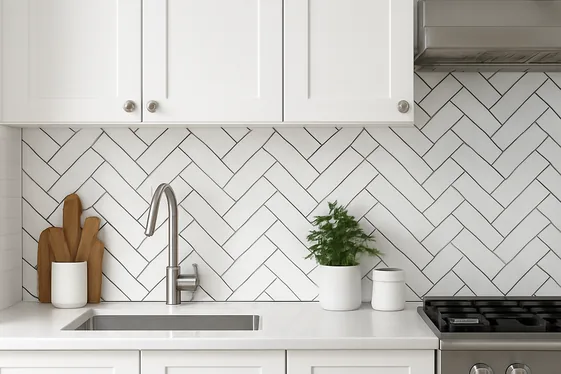
Subtle shifts in grout color can totally change the vibe of classic white subway tiles. Opt for charcoal grout to add a bold, graphic edge or soft gray for understated contrast. The color lines highlight each tile, turning a simple layout into a striking feature. Colored grout also hides dirt better than white, making it a practical choice in busy kitchens.
Exploring pattern layouts boosts the impact even more. Instead of the standard brick pattern, arrange subway tiles in herringbone or vertical stacks for a fresh look. Diagonal or chevron patterns add dynamic movement, drawing the eye upward or across. These layouts bring personality without overwhelming white cabinetry—ideal for anyone craving subtle flair that stands out quietly.
2. Natural Stone Elegance: Marble and Quartz Backsplash Ideas
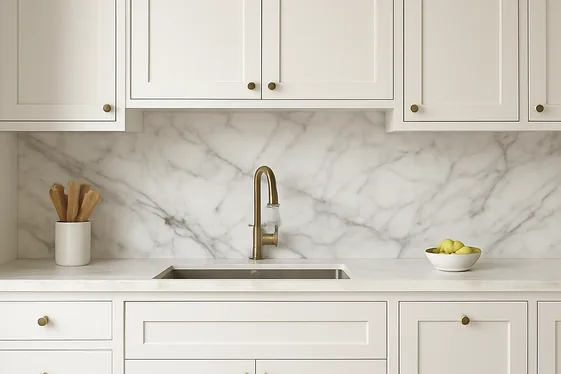
- Marble backsplashes offer timeless appeal with their natural veining, adding subtle texture without overpowering white cabinets.
- Quartz backsplashes provide a sleek, durable surface that resists stains, ideal for busy kitchens needing low upkeep.
- Choose large-format slabs for a seamless look that reduces grout lines and highlights natural stone’s elegance.
- Soft gray or beige veining complements white kitchens, bringing warmth while maintaining a crisp, clean aesthetic.
- Pair a marble or quartz backsplash with brass or matte black hardware to create a balanced modern-rustic contrast.
In my experience, homeowners often overlook how much a single slab backsplash can elevate the entire kitchen’s vibe. It feels more like art than just a functional wall covering. Marble’s cool sophistication and quartz’s consistent pattern both work wonders in brightening the space and lending a refined touch that stays stylish over time.
3. Metallic Accents: Gold, Copper, and Brass Backsplashes
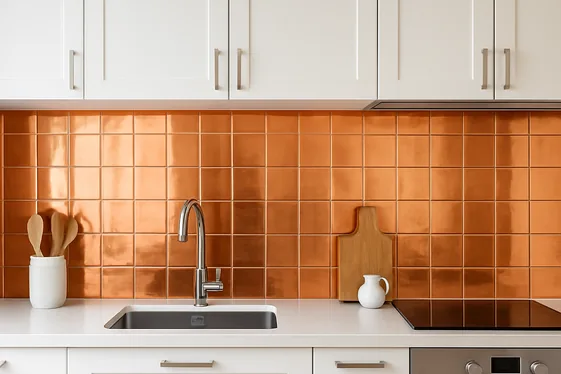
Quick Tip:
Metallic backsplashes like gold, copper, and brass add a warm glow that contrasts beautifully with white cabinets. Use small, rectangular tiles or sleek sheets behind the stove or sink for a standout shimmer that’s easy to clean.
Metallic accents instantly raise your kitchen’s style without overwhelming it. Opt for brushed or hammered finishes to hide fingerprints and smudges. These tones pair well with wood or marble counters, giving your white kitchen a touch of luxe that feels inviting, not flashy. Just don’t overdo it—focus on one wall or area to keep things balanced and modern.
4. Bold Geometric Patterns for a Modern Edge
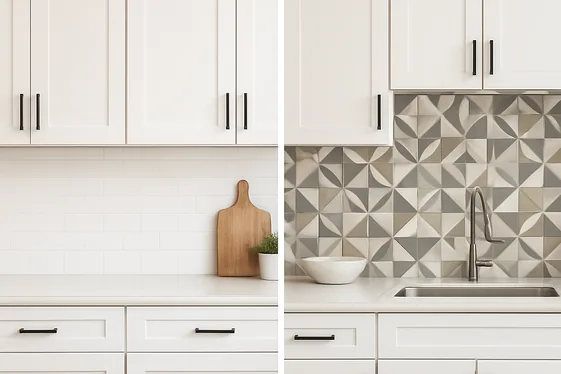
Before: White kitchens sometimes feel too plain or safe, lacking personality and a little excitement behind the glossy cabinets. The whole space can seem flat, missing a modern touch that feels fresh and alive.
After: Bold geometric patterns create instant visual interest and clearly define the kitchen’s style. Triangles, hexagons, or chevron shapes in black, gray, or navy add sharp angles that contrast beautifully with white walls and cabinets, turning the backsplash into the room’s showstopper.
Geometric backsplashes bring a fresh, artistic vibe without overwhelming the space. Pick larger tiles with crisp lines for that modern edge, and keep grout colors consistent to maintain sleekness. They work best behind stoves or sinks where they catch the eye first. Just remember, bolder patterns pair well with simpler countertops to avoid visual overload.
5. DIY Peel-and-Stick Backsplash for a Quick Update
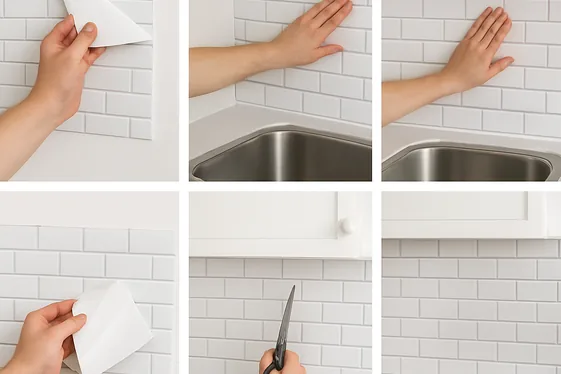
- Clean the wall surface thoroughly with soap and water, then dry it completely to ensure the peel-and-stick tiles stick well.
- Measure your backsplash area carefully, then cut the tile sheets to fit around outlets and corners using a utility knife.
- Peel off the backing of the tile starting in one corner and press firmly onto the wall, smoothing out bubbles as you go with a plastic spreader.
- Continue applying tiles row by row, aligning seams tightly, and trim excess edges for a clean finish.
In my experience, peel-and-stick backsplashes offer a huge upgrade with minimal mess or tools involved. They’re especially handy for renters or anyone wanting to refresh kitchen style fast without committing to grout or mortar. Just give yourself time to prep the surface well for the best adhesion and durability.
6. Glass Panels vs. Traditional Tile: Which Suits You Best?
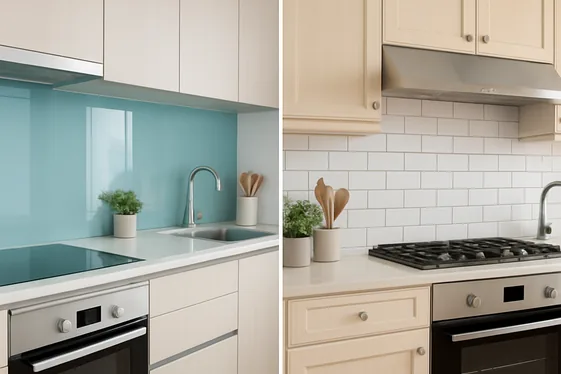
| Point | Glass Panels | Traditional Tile |
|---|---|---|
| Appearance | Sleek, reflective, modern | Classic, textured, varied |
| Installation | Quicker, fewer grout lines | More labor-intensive, grout needed |
| Maintenance | Easy to wipe clean, less grime | Requires scrubbing grout lines |
Glass panels bring a glossy, seamless look that brightens white kitchens and simplify cleaning, saving you time. Tiles offer a timeless feel with endless patterns but need regular grout upkeep. For a fresh vibe with low fuss, go glass; for character and texture, tile stands strong. Choose based on your lifestyle and style craving.
7. Do and Don’t Guide for Maintaining Your Backsplash
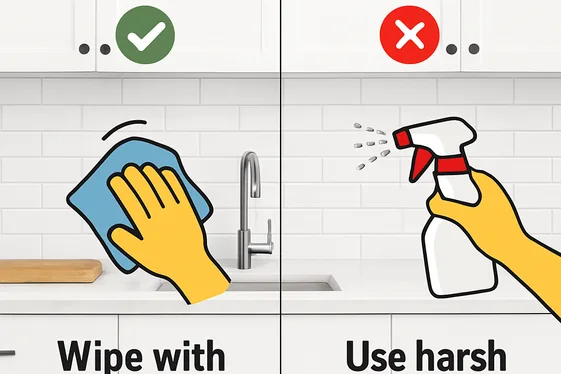
Do:
- Wipe your backsplash daily with a soft cloth and mild soap.
- Seal grout lines every 6-12 months to prevent stains and moisture damage.
- Clean spills immediately to avoid permanent marks on tiles.
- Use a non-abrasive cleaner to protect glossy or delicate surfaces.
Don’t:
- Don’t use harsh chemicals or bleach, which can fade tile colors.
- Avoid scrubbing with steel wool or stiff brushes that can scratch tiles.
- Don’t neglect cleaning behind appliances where grease can build up.
- Avoid high-pressure water sprays that can weaken grout over time.
Keeping your white kitchen backsplash pristine means developing a simple, regular cleaning routine. Stick to gentle products and timely care to preserve that fresh look. Skipping maintenance or using abrasive tools can lead to dullness or costly repairs you’d rather avoid. A little attention now saves big headaches later.
8. Luxe Look on a Budget: Economical Materials That Impress
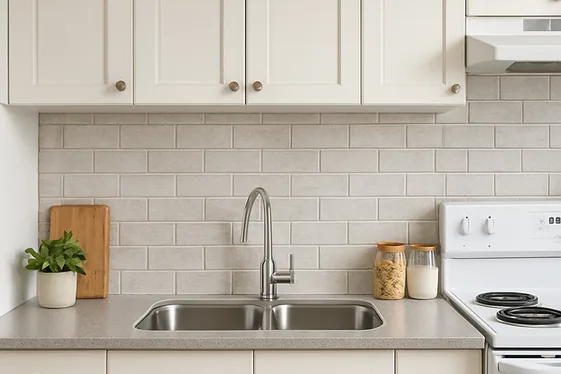
Cost: Low
Time: 2-4 hours
Skill Level: Beginner
Best For: DIYers on a budget
Peel-and-stick tiles, affordable glass mosaic sheets, and vinyl wallpaper offer instant luxury without the luxury price. These materials easily mimic marble, subway tile, or even intricate patterns, letting you install a high-impact backsplash in a snap. Just make sure your walls are clean and dry before applying. Perfect for renters or anyone wanting a fresh look without a long project.
Quick Tip:
Choose a glossy finish for peel-and-stick tiles to catch light and add a subtle glow behind your white cabinets.
9. Textured Tiles for Depth and Warmth
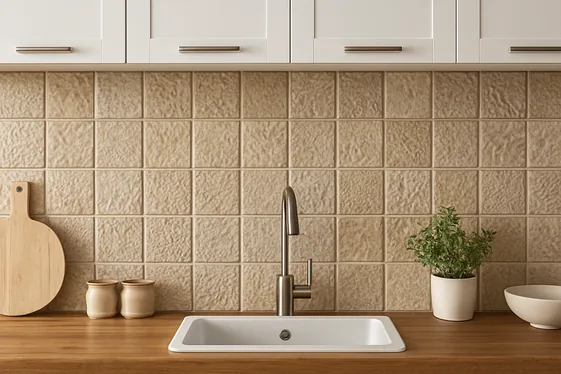
Textured tiles introduce a tactile element that brings both depth and warmth to white kitchens. Think of materials like matte subway tiles, 3D geometric patterns, or hand-glazed ceramics in soft cream or beige hues. In my experience, homeowners appreciate how the subtle texture prevents the backsplash from feeling flat or sterile, turning the wall into an inviting focal point without relying on bold color.
Layering texture can also enhance the kitchen’s cozy vibe, especially paired with natural wood accents or warm lighting. Don’t overlook smaller tiles like mosaics or penny rounds in uneven finishes—they add interest on a subtle scale.
That’s why many experts recommend mixing smooth and textured tiles or varying grout colors to highlight those details. It adds personality without overwhelming your white backdrop.
10. Classic Herringbone Pattern: Timeless and Trendy
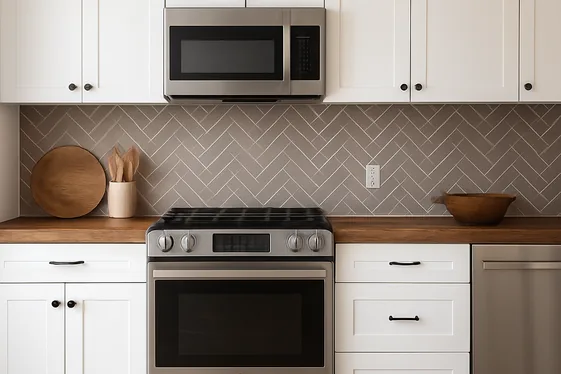
- Herringbone pattern arranges rectangular tiles in a zigzag layout, creating dynamic movement along your backsplash.
- Choose subway tiles in classic white or soft neutrals for a subtle twist that blends well with all-white kitchens.
- Installing the pattern usually requires cutting tiles at 45-degree angles for seamless alignment, so plan for extra tile quantity.
- Matte or glossy finishes both work, depending on the kitchen’s overall texture and light reflection.
- Pair with simple grout colors like light gray or white to keep focus on the pattern’s striking design.
The classic herringbone backsplash effortlessly balances timeless style with a modern edge, enhancing white kitchens without overwhelming them. It draws the eye upward, giving the space a tailored, handcrafted feel. While installation demands precision, the end result adds character and a subtle playfulness that makes your kitchen uniquely inviting.
11. Quick Tip: Using Large Format Tiles in Small Kitchens
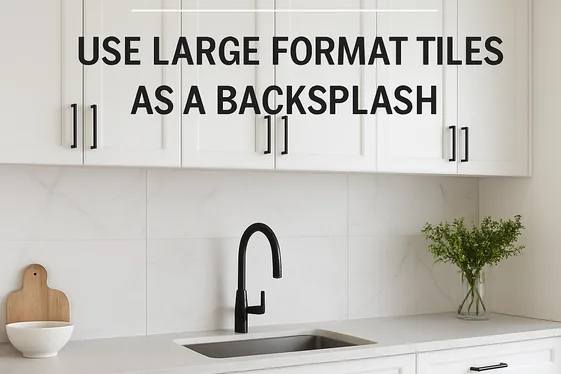
Quick Tip:
Large format tiles can open up small kitchens visually. Pick light-colored tiles with minimal grout lines to keep the backsplash sleek and easy to clean.
In tight kitchen spaces, large tiles reduce the number of grout lines, which keeps walls from feeling busy or cramped. Opt for neutral shades close to your cabinet color to create a seamless flow. This technique makes the kitchen appear broader and more streamlined, perfect when every inch counts.
12. Before and After: From Plain to Eye-Catching Mosaic
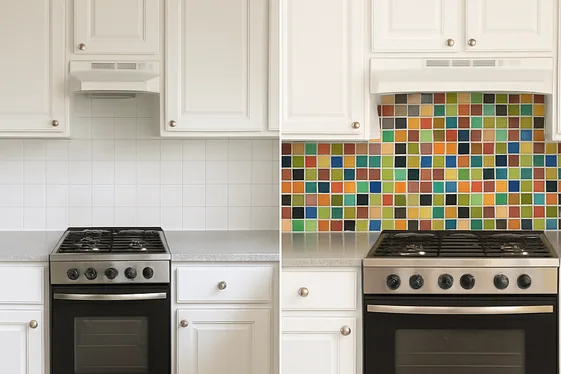
Before: The backsplash was plain white tile that blended too much with the white cabinets, making the kitchen feel flat and uninspired. There was little texture or pattern to catch the eye, and the room lacked character.
After: A colorful mosaic backsplash was installed, featuring small glass and ceramic tiles in shades of blue and gray. The varied shapes and shimmering surfaces created a lively focal point that brightened the space and added personality.
Transforming a plain backsplash into a mosaic is a simple yet powerful way to inject life into a white kitchen. I’ve noticed that mixing materials and colors gives kitchens a handcrafted, inviting feel, while still maintaining a modern edge. Plus, mosaic backsplashes are easier to update over time if you want a fresh look later on.
13. Step-by-Step Installation of a Brick-Style Backsplash
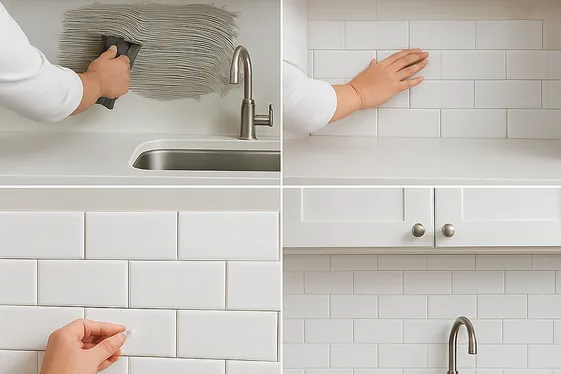
- Measure the backsplash area carefully, then cut your brick-style tiles to fit, keeping grout lines consistent.
- Apply a thin layer of tile adhesive evenly with a notched trowel, working in small sections to prevent drying out.
- Press each tile firmly onto the wall, starting at the center and working outward, using spacers for even gaps.
- After the adhesive sets (usually 24 hours), fill the gaps with grout using a rubber float, wiping away excess with a damp sponge.
Brick-style backsplashes create a charming, textured look in your white kitchen. Taking the time to align and space tiles correctly will give you a smoother finish. Let the adhesive dry fully before grouting to avoid tiles slipping and uneven grout lines. Ready for a backsplash that feels as cozy as your home!
14. Comparison of Matte vs. Glossy Tile Finishes
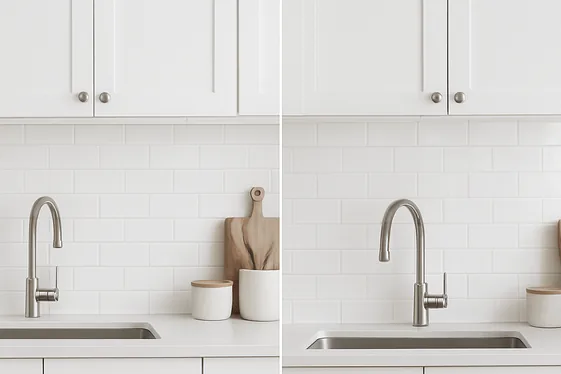
| Point | Matte Finish | Glossy Finish |
|---|---|---|
| Reflectiveness | Low, softens light for subtle look | High, bounces light to brighten space |
| Maintenance | Hides smudges and water spots well | Shows fingerprints and streaks easily |
| Durability | Resists scratches but can stain | More resistant to stains, but prone to scratches |
Matte tiles offer a cozy, understated vibe that hides small messes better, great for busy kitchens. Glossy tiles bring in extra light and make your backsplash pop but need regular wiping to stay fresh. Choose based on how much sparkle you want and how much cleaning you’re up for!
15. Do and Don’t for Selecting Backsplash Colors
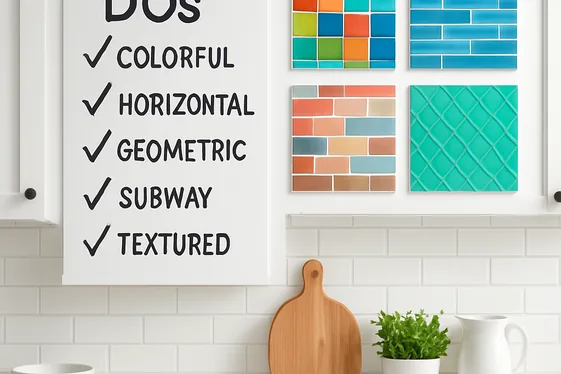
Do:
- Pick backsplash colors that complement your white cabinets, like soft grays or blues.
- Test your chosen color sample under kitchen lighting before finalizing.
- Consider the overall kitchen style—modern finishes need cooler tones; rustic calls for warmer hues.
- Use grout color strategically to either blend with or highlight your backsplash.
Don’t:
- Overwhelm the space with overly bright or clashing colors.
- Ignore the countertop color when selecting your backsplash.
- Choose trendy colors that might feel dated in a few years.
- Forget to consider how the backsplash color will look with your appliances.
Choosing the right backsplash color is about balance. Think about how it interacts with white cabinetry and other surfaces. Taking samples home helps you see the shade in real life. Avoid loud colors that fight the calm vibe white kitchens often create—aim for harmony, not chaos.
16. Quick Facts About Using Cement Tiles
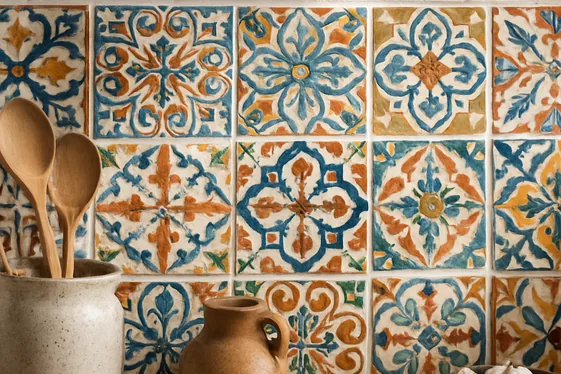
Cost: Moderate to High
Time: Several days for installation
Skill Level: Advanced
Best For: Adding character and durability
Cement tiles bring bold patterns and rich colors to a white kitchen backsplash, standing out against clean cabinetry. I’ve noticed these tiles require sealing to protect against stains and moisture. That’s why many experts recommend hiring a professional for installation—it involves careful cutting and grouting to keep the design intact while ensuring longevity.
The extra effort pays off with a backsplash that feels artisanal and holds up well in busy kitchens.
17. Stacked Stone Backsplash Ideas for Rustic Charm
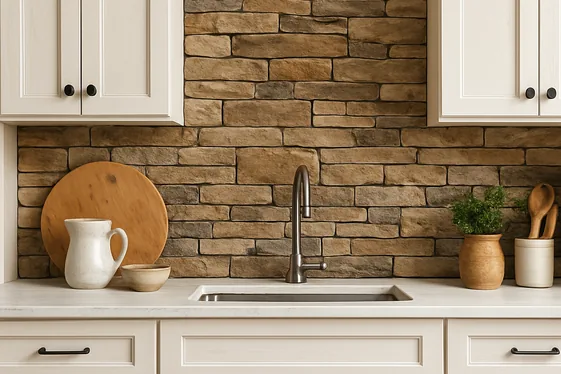
Rustic charm comes effortlessly with a stacked stone backsplash in white kitchens. Opt for thin, horizontally laid natural stone pieces about 1-2 inches high. Arrange them closely with minimal grout for a seamless, textured effect. Shades like warm beige, soft gray, or earth tones bring cozy depth without overpowering your bright walls.
Installing these stones behind open shelves or around the stove area creates a striking focal point that invites warmth. To maintain the rustic appeal, avoid glossy finishes; instead, choose matte or rough textures. Clean with a dry brush to keep stone surfaces intact, as harsh chemicals can erode the natural look.
Stacked stone backsplashes suit farmhouse-style kitchens or those aiming for an organic vibe—pair with wood accents or vintage hardware for full effect. This style highlights both texture and natural beauty, giving your kitchen a timeless personality.
18. Mix and Match Tiles: Creating Visual Interest
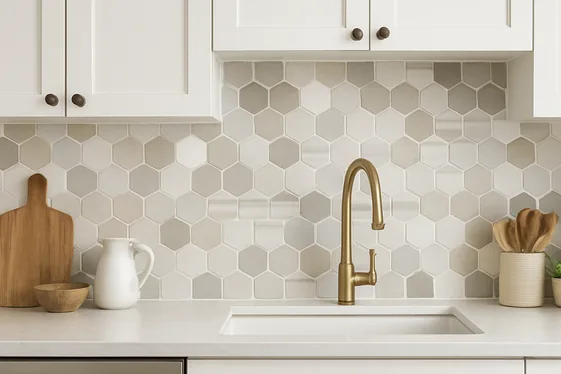
- Select tiles with contrasting shapes or sizes to break the uniformity, such as combining subway tiles with hexagons.
- Mix glossy and matte finishes to add texture without overwhelming the space.
- Incorporate different shades of white or soft grays for a subtle, layered look.
- Play with patterns by alternating solid colors with printed or geometric tiles.
- Use a border or accent strip to define areas and create visual breaks.
Combining various tile styles adds personality to a white kitchen backsplash without clashing. The key is balancing differences so they complement rather than compete. Start with a neutral palette and small sections to see how the mix works before committing to a full wall design. It turns a simple backsplash into an eye-catching focal point.
19. Quick Tip: Choosing the Right Backsplash Height
Quick Tip:
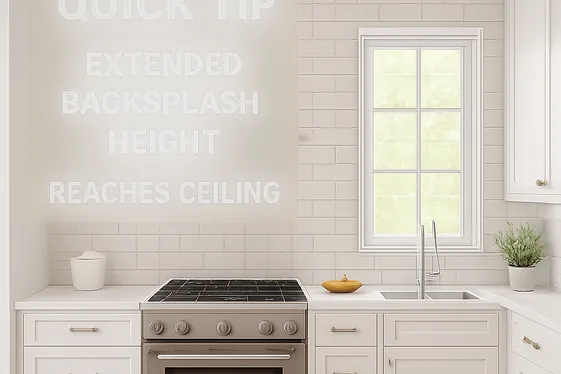
Measure the space between your countertop and the bottom of upper cabinets before choosing backsplash height. For a clean look, stick with standard heights like 15 to 18 inches. Taller backsplashes work well behind stoves or open shelving.
Kitchen backsplashes usually range from 15 to 18 inches high, but I’ve noticed that extending it to the ceiling in open layouts can add dramatic flair and protect walls better. If you have windows or short upper cabinets, customizing height to fit the exact wall space makes your kitchen feel more balanced and tailored.
20. Before and After: Adding a Backsplash Shelf for Style
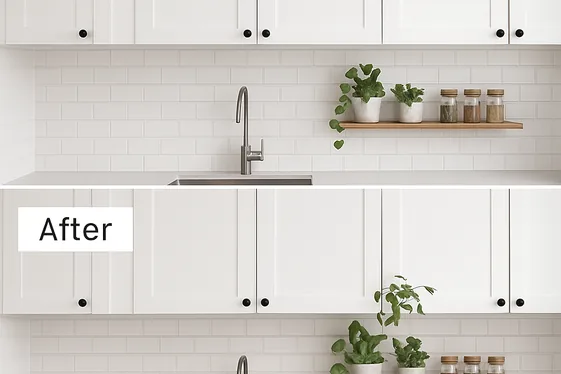
Before: The backsplash area looked plain and lifeless, offering no space to showcase items or add personality. The wall felt empty above the counters, missing both style and functionality.
After: A slim, floating shelf now runs along the backsplash, providing a chic spot for plants, spice jars, or artwork. This simple addition breaks the monotony of white tiles while creating extra storage within easy reach.
Adding a backsplash shelf changes the look and use of your kitchen instantly. Opt for a narrow wooden or metal shelf about 3 to 4 inches deep to avoid crowding the counters. Mount it securely, 12 to 18 inches above the countertop for effortless access and a subtle style boost—it’s a win-win for both style and storage.
21. Step-by-Step Care Tips for Long-Lasting Brightness
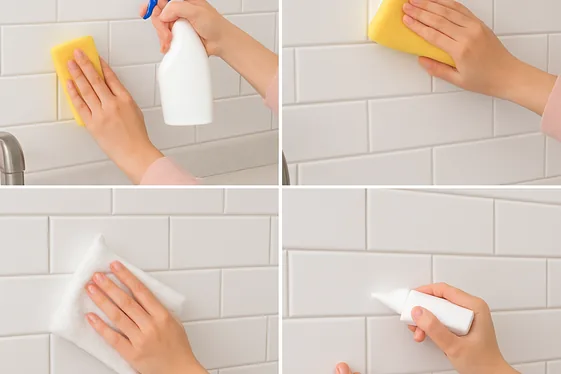
- Clean your backsplash weekly with a mild soap and warm water to keep dirt and grease from settling in the grout and tiles.
- Use a soft sponge or microfiber cloth to gently scrub surfaces, avoiding harsh abrasives that can dull the finish.
- Reseal grout every six months using a penetrating grout sealer to prevent staining and moisture damage.
- Wipe up spills immediately, especially acidic liquids like lemon juice or vinegar, which can etch tile surfaces over time.
- Avoid standing water on your backsplash by drying the area after cooking or cleaning to maintain a bright, fresh look.
Regular maintenance keeps your white backsplash shining and fresh. With simple weekly cleaning and timely grout resealing, your kitchen’s glow will last without costly renovations. Quick action on spills prevents stains and dull spots, ensuring your backsplash stays a standout feature in your home.
Conclusion
White kitchens shine brilliantly when paired with the right backsplash, and these 21 ideas offer plenty of ways to customize your space. From classic subway tiles with a modern twist to textured stone surfaces and affordable DIY updates, you can find options that fit your style, budget, and skill level.
Keep in mind how maintenance, tile size, and patterns affect both function and aesthetics. Use grout color and backsplash height to tweak the look further. Remember, the backsplash not only protects your walls but also serves as a key design element. Whether you want subtle depth or bold patterns, these ideas provide a starting point to make your kitchen truly yours.
Take your time exploring options, test samples in your lighting, and choose what feels right for your home’s personality. With a little effort, your white kitchen can become a modern, inviting heart of the house.

Sarah Parker is a creative content writer with experience in crafting engaging, reader-friendly, and SEO-optimized content. She specializes in writing blog posts, website copy, social media captions, and digital marketing content across niches including lifestyle, home decor, business, and technology. Her writing style focuses on clarity, audience engagement, and search engine visibility.